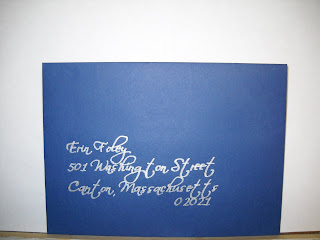
Use your handy dandy home printer! I know, you probably think I'm crazy, but get on this safari ride and let me take you on my calligraphy adventure.
Let's start at the very beginning; it's a very good place to start... (Anyone else singing Sound of Music... umm, no, just me?)
1. Pick a font that will look totally kick a$$ on your invitation envelopes. I picked Scriptina.
2. Next, go into Microsoft Word, or whatever word processing program you fancy. (I used Word, so my directions will apply more specifically to that program.) Under the tab, Tools, click on Letter and Mailings and then Envelopes and Labels.

3. A little window will open up. This window will allow you to enter the address, change the font and move the address to wherever you desire it to be on the envelope. Handy, huh?

4. Hit print. And actually, before you hit print, check the bottom right of the window for a little box called Feed. This box will show you how to feed your envelope into your printer.

5. If you've got all your addresses in a spreadsheet, you can actually do a mail merge and print all your envelopes at one time. Me, being the smart person I am, decided to make this step more difficult, but I will not burden you with my troubles.
6. Once you've got your printed envelopes, you need to choose a pen that you want to use for your calligraphy. Because my envelopes are dark, I decided to go with a metallic silver. If you've chosen lighter envelopes, you may want to stick to a classic black.
I picked my pens (yes, that's right, pens, I bought four different kinds) at Michael's, one of my homes away from home. I couldn't decide which would work best.
7. Simply trace the printed font with your calligraphy pen and voila! You're now a calligraphy master. Congratulations!
So do you see calligraphy master in your future?


No comments:
Post a Comment